Measuring Liquid Volumes
Purpose: To develop skill in measuring with a graduated cylinder, to use the metric system in measuring volume, and to use
rounding to express measurements.
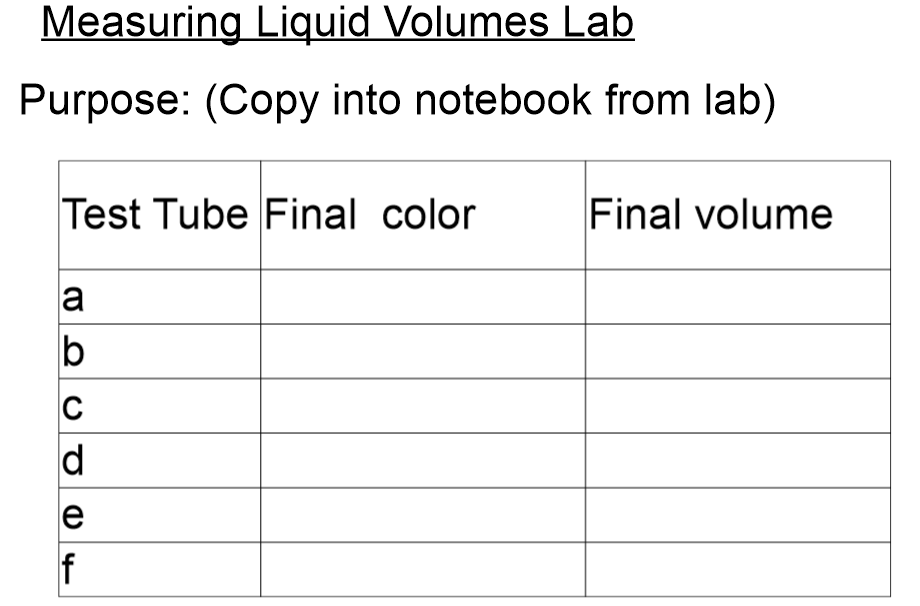
Copy the purpose & the following data table into your notebook.
rounding to express measurements.
Copy the purpose & the following data table into your notebook.
 a 100-mL beaker.
Background: Many pieces of laboratory glassware are indicated by size, such as a 250-mL flask or a 100-mL beaker. However, these volume designations are only approximate.
Graduated cylinders
can be used for more precise measurements.
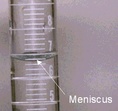
When water is
poured into a graduated cylinder, the surface of this water in contact with the
air curves downward to form a meniscus.
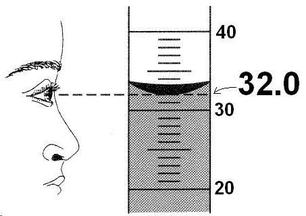
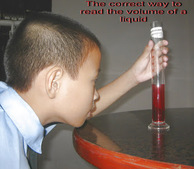
Proper way to read graduated cylinder.
|
The bottom of the
curved portion, or meniscus, is taken as the liquid level. It is important to read the liquid level at eye level to prevent
errors.
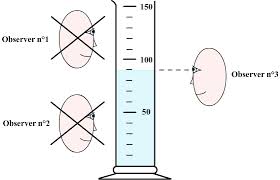
Only Observer #3 will have an accurate reading of the graduated cylinder's water level.
|
Materials: 3 small beakers, colored solutions, 10-mL graduated cylinder, 6 large test tubes, test tube rack, 25-mL graduated cylinder
REMEMBER: PIPETS COMING FROM THE RED, BLUE, and YELLOW solutions should ONLY be used for those solutions. Use a SEPARATE PIPET to help you measure accurately.
REMEMBER: PIPETS COMING FROM THE RED, BLUE, and YELLOW solutions should ONLY be used for those solutions. Use a SEPARATE PIPET to help you measure accurately.
Procedure: Be certain to read all steps carefully to avoid errors.
1. Make sure each test tube is labeled A, B, C, D, E, or F.
2. Using the pipet, measure 19 mL of red liquid using the 25mL graduated cylinder. Pour into Test Tube A. Rinse out graduated cylinder.
3. Measure 18 mL of yellow liquid. Pour into Test Tube C. Rinse out graduated cylinder.
4. Measure 18 mL of blue liquid. Pour into Test Tube E. Rinse out graduated cylinder.
5. From test tube C, measure 4 mL of yellow liquid and pour it into Test Tube D. Rinse out graduated cylinder.
6. From test tube E, measure 7 mL of blue liquid and add it to Test Tube D. Mix. Rinse out graduated cylinder.
7. From the BEAKER of blue liquid, measure 4 mL and pour it into Test Tube F. Rinse out graduated cylinder.
8. From the BEAKER of red liquid, measure 7 mL and add it to Test Tube F. Mix. Rinse out graduated cylinder.
9. From test tube A, measure 8 mL of red liquid and pour it into Test Tube B. Rinse out graduated cylinder.
10. From test tube C, measure 3 mL of yellow liquid and add it to Test Tube B. Mix. Rinse out graduated cylinder.
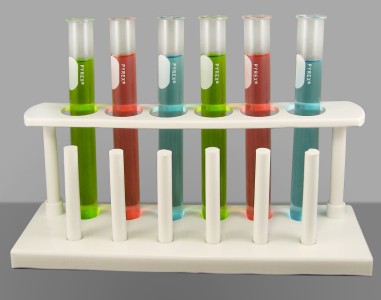
11. Take a photo of your set of test tubes. (You will need your photo for the analysis assignment.)
12. One by one, measure the total amount of liquid in each test tube to the correct precision using a graduated cylinder and record on your data table.
Clean UP WORKSPACE. All liquids can be put down the drain and all test tubes and graduated cylinders should be rinsed and dried!
1. Make sure each test tube is labeled A, B, C, D, E, or F.
2. Using the pipet, measure 19 mL of red liquid using the 25mL graduated cylinder. Pour into Test Tube A. Rinse out graduated cylinder.
3. Measure 18 mL of yellow liquid. Pour into Test Tube C. Rinse out graduated cylinder.
4. Measure 18 mL of blue liquid. Pour into Test Tube E. Rinse out graduated cylinder.
5. From test tube C, measure 4 mL of yellow liquid and pour it into Test Tube D. Rinse out graduated cylinder.
6. From test tube E, measure 7 mL of blue liquid and add it to Test Tube D. Mix. Rinse out graduated cylinder.
7. From the BEAKER of blue liquid, measure 4 mL and pour it into Test Tube F. Rinse out graduated cylinder.
8. From the BEAKER of red liquid, measure 7 mL and add it to Test Tube F. Mix. Rinse out graduated cylinder.
9. From test tube A, measure 8 mL of red liquid and pour it into Test Tube B. Rinse out graduated cylinder.
10. From test tube C, measure 3 mL of yellow liquid and add it to Test Tube B. Mix. Rinse out graduated cylinder.
11. Take a photo of your set of test tubes. (You will need your photo for the analysis assignment.)
12. One by one, measure the total amount of liquid in each test tube to the correct precision using a graduated cylinder and record on your data table.
Clean UP WORKSPACE. All liquids can be put down the drain and all test tubes and graduated cylinders should be rinsed and dried!
Complete the assignment on Google Classroom. Each student completes the analysis individually.
